Showing posts with label Paper. Show all posts

14/02/2014

Valentine Gift


Preparation
   
- Popsicle stick
- Glue, scissors, knife
- Ruler, pen, cardboard
- BBQ stick
Start
Step 1:
- Using knife to split the Popsicle stick vertically 
Step 2:
- Using knife and scissor to make one end round and the other into 45 degree 

Step 3:
- Make a border shape like the picture.
Step 4:
- Stick 2 stick before onto the board.
Step 5:
- Stick 2 piece on the side for the legs

Step 6:
- Make the handles and the seat.
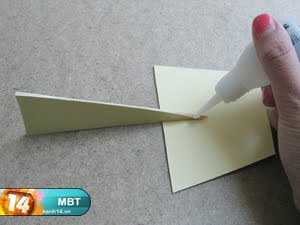
Step 7:
- Take the cardboard and fold as the picture.
Step 8:
- Stick on the back of the chair and finished.
 Enjoy.. 


12/07/2013

Handmade Clock skin - Making personalize clock for your own time table.

Preparation

   
-Knife, Scissors, Glue

- Ballpoint pen, white colour pen

- Ruler, Linex compass

- Old watch

- 1 black and 1 white cardboard


Step 1:

- Cut 2 cardboard into circle. The black one is the smaller one
Step 2:

- Divide the time into the porportion that you want
Step 3:

- Do it again with white colour pen
Step 4:

- Stick 2 cardboard together by glue
Step 5:

- Take out the hand of the old clock and fit it into the composite you make.
Enjoy! 
Nên đánh dấu cả thời gian lên đó nữa thì sẽ dễ quản lý hơn đấy! 


30/06/2013

Key skin


Preparation:
Tạo dấu ấn riêng biệt cho những chiếc chìa khóa 1- Keys
- Colour Paper
- Glue
- Scissors
- Knife
Making:
Tạo dấu ấn riêng biệt cho những chiếc chìa khóa 2Step 1:
- Using pen to draw the line on colour paper around the key, then cut it out.
Tạo dấu ấn riêng biệt cho những chiếc chìa khóa 3Step 2:
- Using knife to cut the middle hole on paper
Tạo dấu ấn riêng biệt cho những chiếc chìa khóa 4Step 3:
- Stick the paper onto they key
Tạo dấu ấn riêng biệt cho những chiếc chìa khóa 5Bước 4:
- Repeat the step
Enjoy!
Tạo dấu ấn riêng biệt cho những chiếc chìa khóa 6
You can use as many colour  as you like


Tạo dấu ấn riêng biệt cho những chiếc chìa khóa 7
Here again!


Tạo dấu ấn riêng biệt cho những chiếc chìa khóa 8

There are a lot of new things. Please come again.


Tạo dấu ấn riêng biệt cho những chiếc chìa khóa 9

29/06/2013

How to make train photo frame (with pictures)


This is the finished photo frame. I'm going to show you step by step with pictures how to make theses lovely photo frames for family and friends.


Preparation:

Card craft
Glue
A marker
Scissors


STEP 1:
Cut a piece of card into 2 pieces of train head (you can decide the frame's size)


STEP 2:

Use a pen to draw the windows
Use a craft knife to cut out the windows from the train head.


STEP 3:

Cut another piece of paper
Use a craft knife to cut out the windows


STEP 4:

Cut round shape for a wheel


STEP 5:

Stick everything together


STEP 6:

Cut the hard paper into triangle shape like this


STEP 7:

Stick them by strong glue at the back along the edge


Enjoy!!!


Recycle item 1

1. Lamp:


Preparation: 1 noodle cup, 3 yogurt bottle, 1 candy box
Start:


Step 1: Make a hole in everything you prepare for electric wire. 
Step 2: Stick them together like the picture.


Step 3: Paint the lamp leg any color you like

Step 4: To make the light cover, using the noodle cup. Use paper to cover or you can paint whatever you like. 
Step 5: Stick them together and enjoy!!
See you soon

Download here

Followers